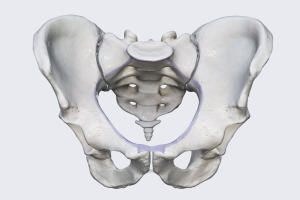
The Pelvis is not a fixed entity. There are joints which allow for the pelvis to modify its shape. In doing so, this allows for more space for baby during labor as well as helping the pelvic floor to lengthen in order to yield and support the baby during birth.
Navigation
Understanding Pelvic Movement
The pelvis is divided into 3 levels: the inlet, mid-pelvis and the outlet. Each level has the ability to widen and close based on the position of the legs and movement of the pelvis. For example, when the legs are externally rotated, meaning, the legs and toes are turned out like a ballerina, the top of the pelvis, inlet, widens from side to side. When the legs are turned in, the bottom of the pelvis, the outlet, is wider from side to side.
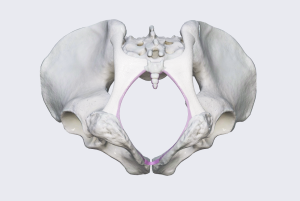
What does it mean to “open the pelvis”?
While most yoga practitioners think of “hip opening poses” as just big external rotation positions, there are actually 6 movements of the hips. It’s important to utilize all 6 movements to maintain a healthy, balanced pelvis. When it comes to ways to open the pelvis, we are going to focus on 4 of these movements and how each position affects the shape and space of the pelvis differently.
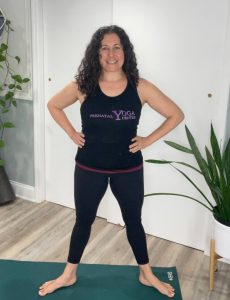
External rotation: Legs are turned out. Opens the pelvic inlet from side to side
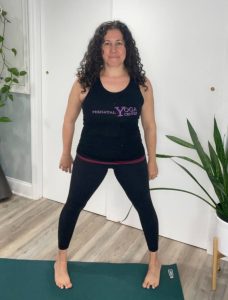
Internal rotation: Legs are turned in. Opens the outlet from side to side
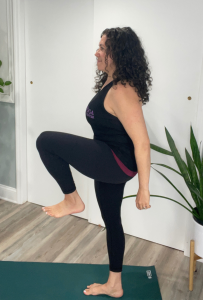
Flexion: The leg is moving towards the torso. When the legs are above 90 degrees, the sacrum moves into nutation and the pelvic outlet widens from front to back.
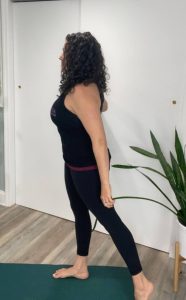
Extension: The leg moves away from the front plane of the torso. This movement opens the pelvic inlet from front to back.
Sacral Movement and Pelvic Opening
We also have the position of the pelvis to consider! Let’s get a little geeky and dive into some of the nuances of the pelvis and its movements.
The pelvis is made up of three main parts:
- Left and Right Innominate Bones (Hip Bones): These meet in the front at the pubis symphysis, a joint made of cartilage.
- Sacrum: The triangular bone at the base of the spine. It connects to the hip bones at the sacroiliac joints (SI joints).
- Coccyx (Tailbone): Located at the very end of the spine.
The SI joints allow the sacrum and tailbone to move independently of the hip bones. This movement is essential for opening the different levels of the pelvis during labor. Think of the sacrum like a trap door that can open to create extra space for the baby.
Nutation and Counternutation

The sacrum can tilt in two directions:
- Nutation: The top of the sacrum tips inward, toward the pelvic inlet. This widens the pelvic outlet from front to back as the tailbone shifts backward.
- Counternutation: The top of the sacrum tips backward, away from the pelvic inlet. This widens the pelvic inlet from front to back as the tailbone swings forward.
These movements are most noticeable when we look at the overall positioning of the pelvis:
- Anterior Pelvic Tilt (APT): The pelvis tilts forward, and the sacrum moves into nutation, opening the pelvic outlet.
-
Posterior Pelvic Tilt (PPT) : The pelvis tilts backward, and the sacrum moves into counternutation, opening the pelvic inlet.
Why Pelvic Opening Matters for Labor and Birth
As I mentioned before, the pelvic bones moving can make space for baby during labor and birth. Babies don’t have a straight shot out. They take a few turns as they maneuver the pelvis.
Early Labor – Entering the Pelvis
The widest part of a baby who is in the cephalic position is the baby’s head from front to back. In most pregnant bodies, the pelvic inlet is widest from side to side. This is why most babies enter the pelvis from the side during early labor.
Active Labor – Rotating at the Mid-Pelvis
As labor starts to turn the corner into active labor, around 5-6cm, the baby also turns 90 degrees at the ischial spines at the mid-pelvis. This is where the pelvic floor starts and the baby now has its head front to back in the pelvis.
Final Stage – Exiting the Pelvis
Labor forges forward and the baby moves under the pubic bone and into the pelvic outlet. Once the head is out, the widest part of the baby is now the shoulders, so the baby swings back around to have its back to the side, so the wide shoulders can come through the pelvic outlet.
Creating Space for a Smoother Birth
Inlet
Focus: External rotation of the legs, counternutation of the pelvis and leg extension.
Here are some positions that encourage external rotation, counternutation, and leg extension to help open the pelvic inlet.
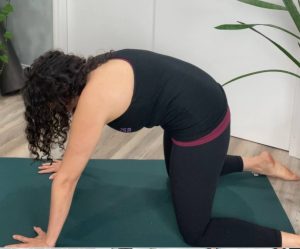
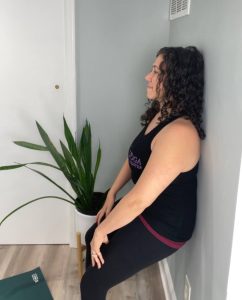
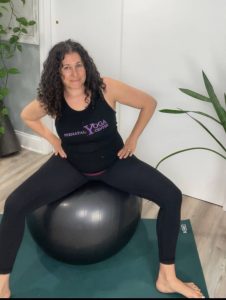
- Rocking back and forth or circling hip on a ball
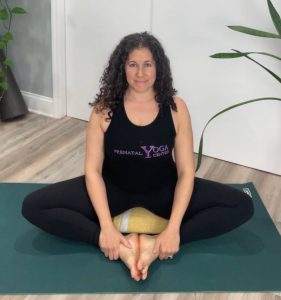
- Baddha Konasana (Seated Butterfly Position)
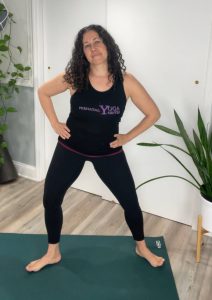
- Standing legs turned out while winging the hips from side to side
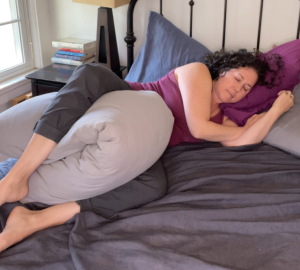
- In bed with a peanut ball or big pillow legs turned out
- “Flying cow girl” from Spinning Babies methodology
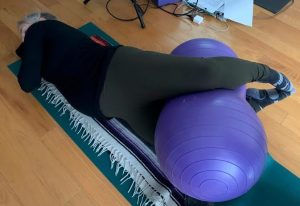
- Wide knee but upright leaning on a ball or blocks
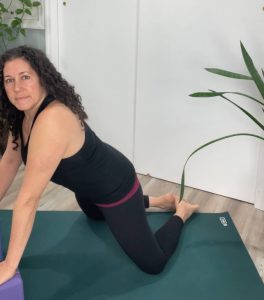
Mid pelvis
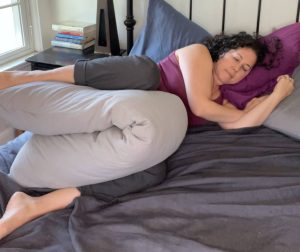
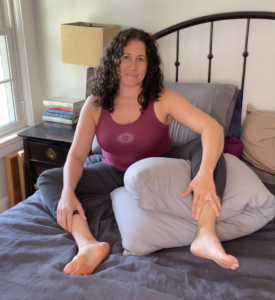
Focus: Asymmetrical positions of the legs (meaning one leg is in a different position than the other). This helps create space within the mid-pelvis, where the baby needs to rotate.
Explore these asymmetrical positions to encourage opening and mobility in the mid-pelvis:
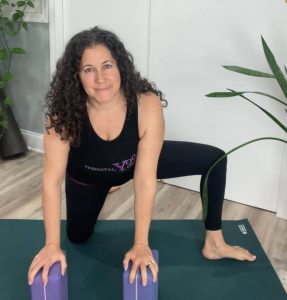
- Walking stairs
- Foot on a stool
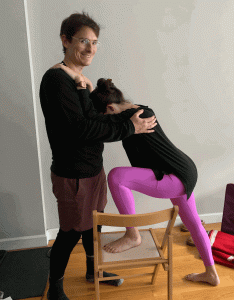
- One leg on a yoga block on all 4’s
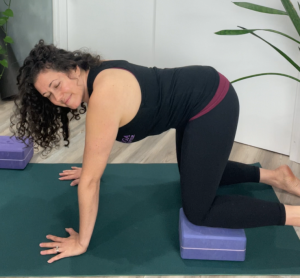
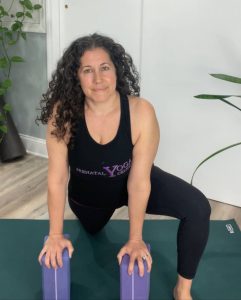
- Side lying with a peanut ball or big pillow
- Sitting with one leg on a peanut ball or pillow. This pose actually opens the mid pelvis and the inlet. It is also great for helping baby rotation!
- One leg in side lunge/squat and one in virasana, sitting on two or three blocks.
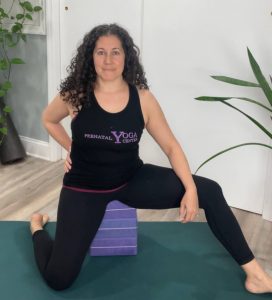
- Asymmetrical side lying with a peanut ball or big pillow
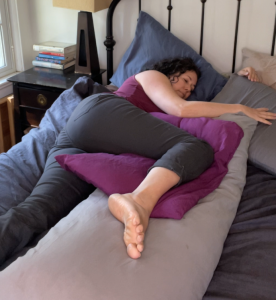
Outlet
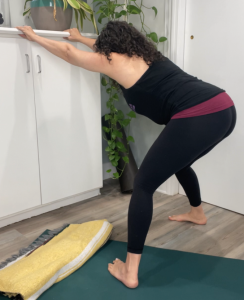
Focus: Internal rotation of the legs, Anterior Pelvic Tilt (APT) and Leg flexion beyond 90 degrees (like a squat)
These positions encourage internal rotation, an anterior pelvic tilt, and deep squats to help open the pelvic outlet.
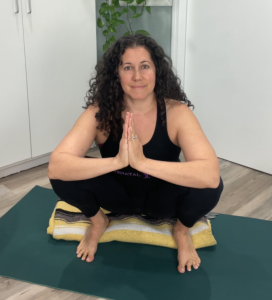
- Side lying with internal rotation and a peanut ball or big pillow
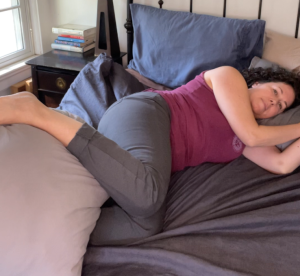
- Side lying internal rotation
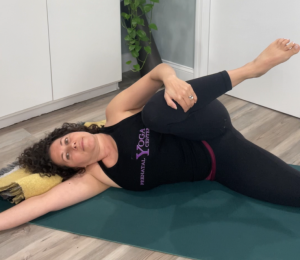
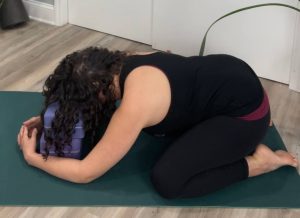
- Knee’s in, feet out while standing and on back.
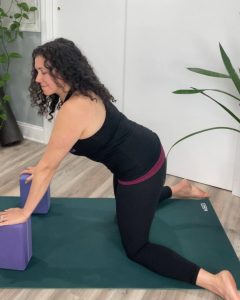
While birth is unpredictable, it’s empowering to have tools that can help you and your baby and body work together on this endeavor. Practice these different positions ahead of time so they are in your body and you are comfortable with them. Consider printing this out and tucking it in your hospital bag as a cheat sheet to remind you of positions you may want to try during labor.
FAQs
When should I start doing these exercises?
You can begin incorporating these exercises into your routine as early as your first trimester, but always listen to your body and stop if you experience any pain or discomfort.
Can these poses help with labor pain?
While these exercises cannot guarantee a pain-free labor, they can help prepare your body for an easier path for baby and the physical demands of childbirth, potentially easing discomfort and promoting a smoother labor.
What are the other benefits of these movements besides preparing for labor?
These positions can also help to improve posture, reduce back pain, balance the pelvic floor muscles, increase flexibility, and promote relaxation and stress reduction during pregnancy.


