“], “filter”: { “nextExceptions”: “img, blockquote, div”, “nextContainsExceptions”: “img, blockquote, a.btn, a.o-button”} }”>
Heading out the door? Read this article on the new Outside+ app available now on iOS devices for members!
>”,”name”:”in-content-cta”,”type”:”link”}}”>Download the app.
Because of its tendency to be so achy, your lumbar area usually dominates the conversation when it comes to spinal talk. But the thoracic spine is an essential and easily overlooked link when it comes to preventing upper back pain. Practicing a few simple strengthening moves with some yoga for the thoracic spine can change that.
Anatomy of the Thoracic Spine
The bony protrusion at the base of your neck marks the first of 12 vertebrae in the thoracic region known as T1 to T12. This area creates a concave curvature in the upper back and it connects your neck and lower back, supports your rib cage and works with your shoulder blades to provide stability to the upper body and coordinate complex movements, such as those in your yoga practice.
If you practice Chaturanga or core work a lot, you’re likely tight in your pecs, lats, and shoulders. This can affect your ability to reach your arms overhead in everyday life and in yoga poses such as Handstand (Adho Mukha Vrksasana), Upward Salute (Urdhva Hastasana), and Cow-Face Pose (Gomukhasana). Stiffness in the tissues surrounding the T-spine can also cause shoulder strain and promote compression of the nerve roots, which can lead to pain and numbness in your shoulders, neck, and fingers.
3 Essential Yoga for Thoracic Spine Poses
The following yoga poses help release and retrain your T-spine to extend and rotate freely, which can help correct posture, decrease pain and the potential for injury, and allow for you to workout unencumbered by tightness. Practice these moves as part of your upper-body workout or after any long period of sitting and slouching forward to hit the reset button on your back.

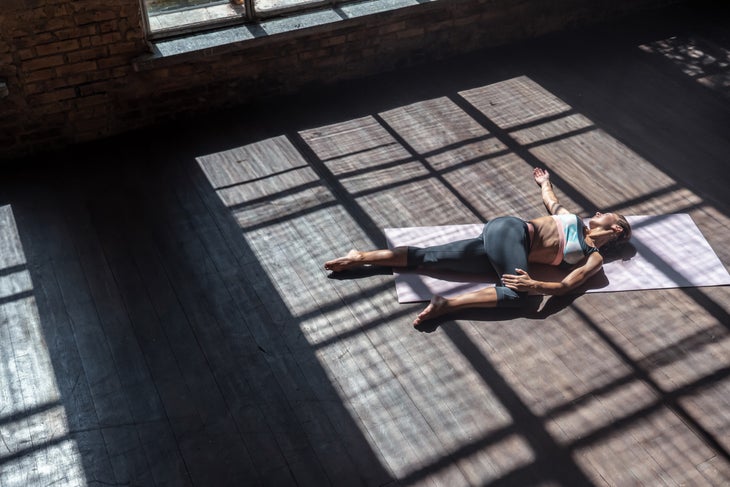
1. Reclined Twist
Lie faceup with a couple of pillows or a foam roller along your left side. Bend your right hip and knee approximately 90 degrees, then cross your knee over your body to the left. If you need, rest your knee on the pillows or roller. Release your right shoulder blade into the mat to isolate the rotation in your T-spine rather than stretching your chest. Breathe here for 3 to 5 seconds and then release. Switch sides.

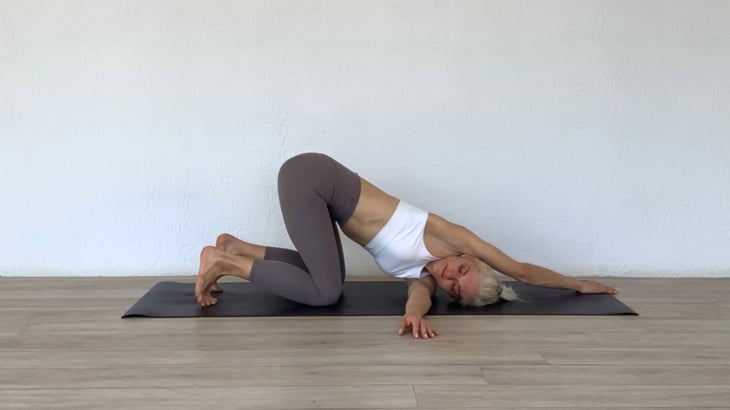
2. Thread the Needle
Come to all fours with your hands directly beneath your shoulders and your knees under your hips with your spine neutral. Keep your hips square as you reach your left arm underneath you toward the right side of the mat. Rest your left shoulder and side of your head on the mat. Stay here or walk your right arm forward. Breathe here for 30 seconds. Switch sides. You can make this stretch more dynamic by adding rotation: After threading the needle, rotate the opposite direction and extend your arm straight up toward the ceiling.

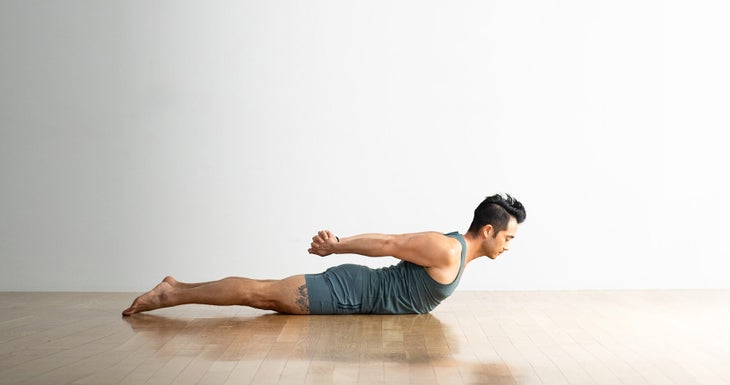
3. Locust Pose
Lie facedown on a mat with your arms at your sides, palms facing down. Press your front hip points into the mat and draw your shoulder blades down your back as you lift your upper body and arms slightly off the floor, keeping your chin tucked and your lower body anchored to the mat. Keep your palms floating above the mat or interlace your fingers behind your back and reach your knuckles toward the wall behind you. Keep your gaze down and slightly forward. Stay here for a few breaths and then return to the floor. Repeat several times.
A version of this article originally appeared on Oxygen Magazine.


